How to use GPO with Ubuntu
As explained in previous chapter, there are two sets of Ubuntu specific settings in the Group Policy Management Editor:
[Policy Name] > Computer Configuration > Policies > Administrative Templates > Ubuntufor the machine policies.[Policy Name] > User Configuration > Policies > Administrative Templates > Ubuntufor the user policies.
Your first Ubuntu GPO rule
For this example we will use a test domain called warthogs.biz with two separate OUs.
The machine is called
adclient04and belongs towarthogs.biz > MainOffice
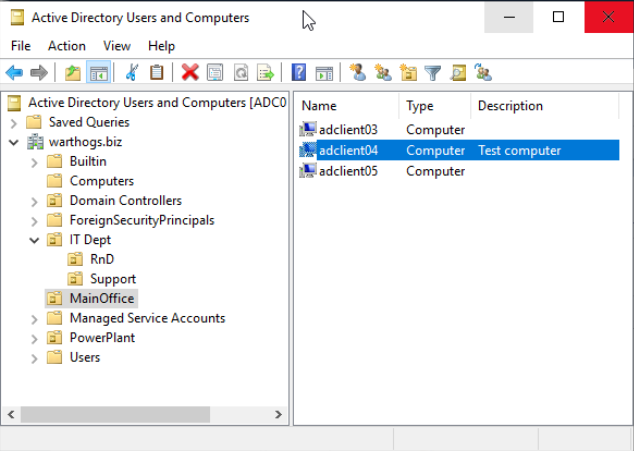
The user is called
boband belongs towarthogs.biz > IT Dept > RnD
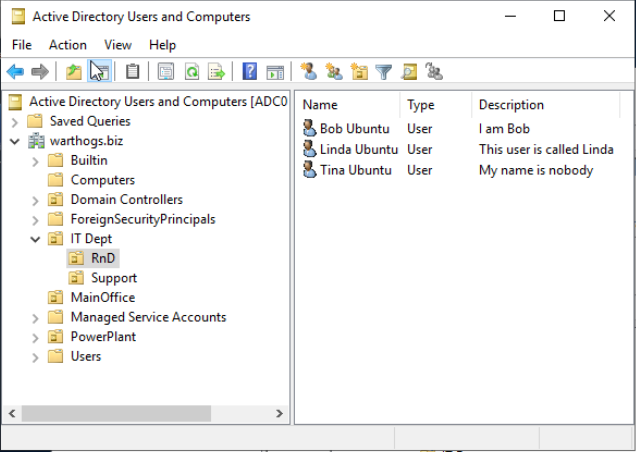
In this example, we will demonstrate how to change dconf settings. We will first modify the greeter background image to illustrate how to enforce a computer setting and the list of preferred applications in the launcher for the user settings.
Modifying a computer setting
Launch the GPO Management editor and create a GPO in warthogs.biz > MainOffice
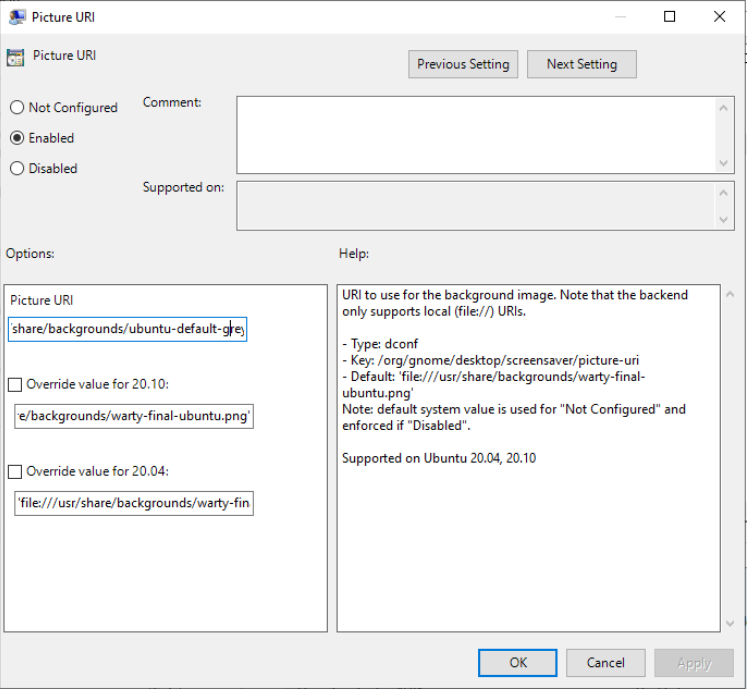
Select GDM background picture setting in
Computer Configuration > Policies > Administrative Templates > Ubuntu > Login Screen > Interface > Picture URI.Select
Enabledto enable the modification of thePicture URIfield.Enter a valid absolute path to a
.pngimage on the client machine, e.g./usr/share/backgrounds/ubuntu-default-greyscale-wallpaper.png.Refresh the GPO rule on the client by rebooting the machine or running
adsysctl update -m(You may be prompted to enter your password to check if have enough privileges to run the command)
The change is now visible on the greeter.
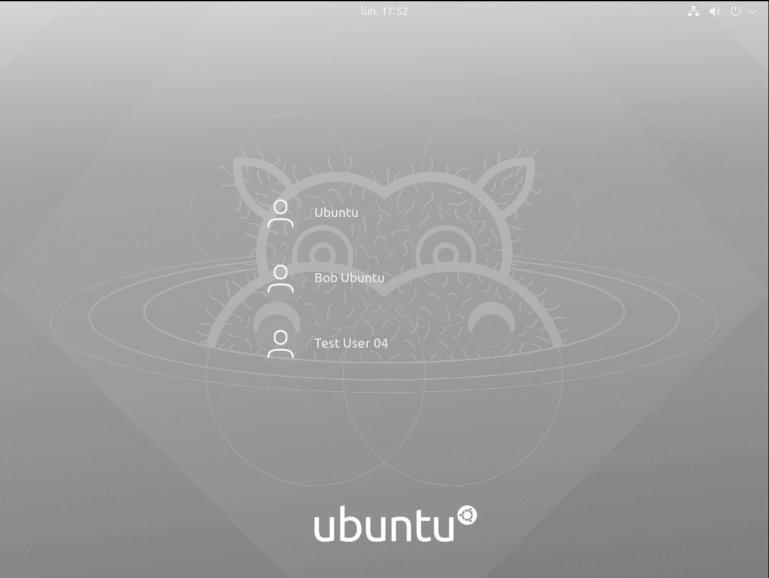
Files are not copied by the Active Directory client and must already exist on the target system at this given path.
Modifying an user setting
Let’s create another GPO in
warthogs.biz > IT Dept > RnD.Select the list of favorite desktop applications setting in
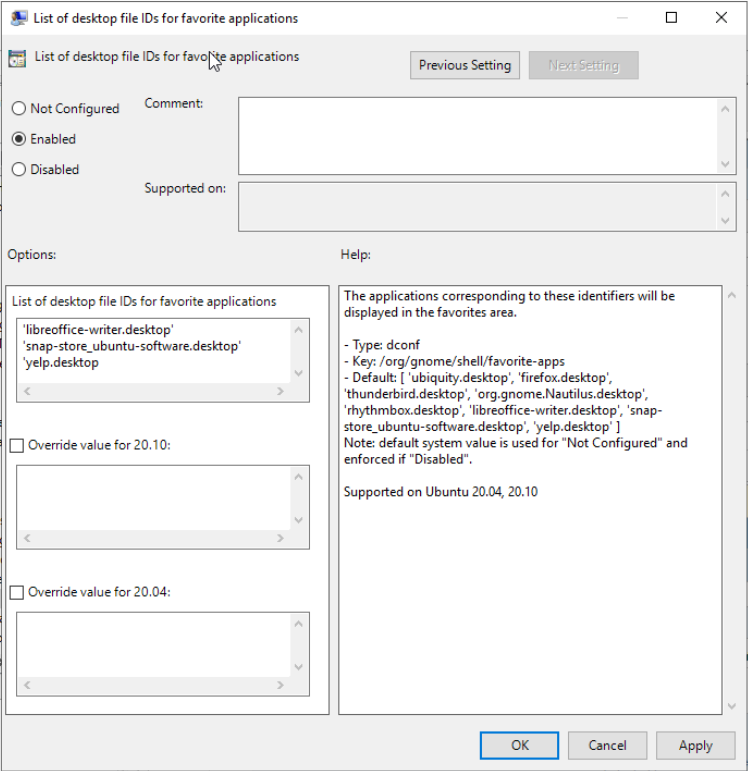
User Configuration > Policies > Administrative Templates > Ubuntu > Desktop > Shell > List of desktop file IDs for favorite applications.Enter a list of valid .desktop file IDs, one per line, like the following:
libreoffice-writer.desktop
snap-store_ubuntu-software.desktop
yelp.desktop
Refresh the GPO rule applied to the user by logging in or running
adsysctl updateas your current user oradsysctl update --allto refresh the computer and all active users.
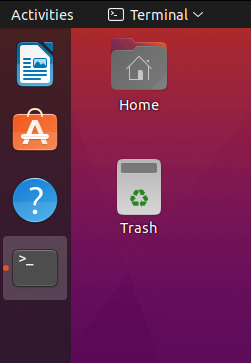
The list of applications showing up on the left side for your current Active Directory user should be updated.
There are other ways of defining a list in ADSys / Active Directory integration. Check the “Different types of widgets” section below.
General principles
There are multiple policy managers for different types of settings. As of now, only a dconf manager is available.
When settings are common to a machine and users, the machine settings will always take precedence over the user ones.
The workflow to update a setting in the GPO Management editor and to apply the setting to a target user or machine is similar to Windows clients. However, we will see below that there are slight differences when the GPO are applied and refreshed between Windows and Ubuntu.
When are GPO applied?
Any change to a GPO is applied:
On boot for the machine settings
On login for the user settings
A periodic refresh timer will update the GPOs of the machine and all active users.
Next section will detail how to configure this and what happens when the Active Directory controller is unreachable.
State of GPO settings
Most GPO rules can have three states: enabled, disabled, not configured. These states may have different meanings depending on the manager.
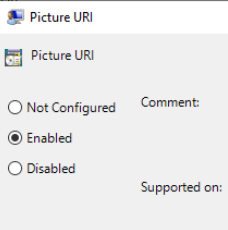
General information of a setting
The left pane of the GPO Management Editor contains the options that can be edited when a setting is enabled.
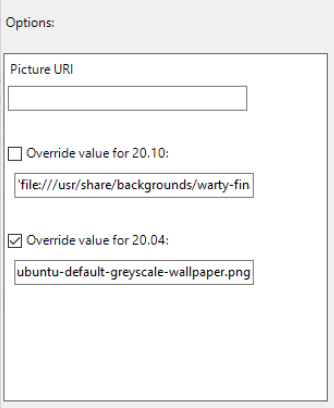
There is a default value for all the releases and an override for each supported release of Ubuntu. More about multiple releases in the next section.
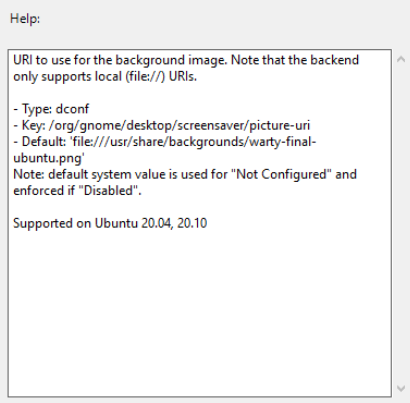
The right pane of the GPO Management editor contains the general information about the GPO including:
The description of the setting
The type of settings (e.g. dconf)
The path of the key in our schema
The default value of the key that is used if nothing is set on the left pane. Note that if defaults differ between releases, this will be a list per release.
The list of releases that support this setting.
Different types of widgets
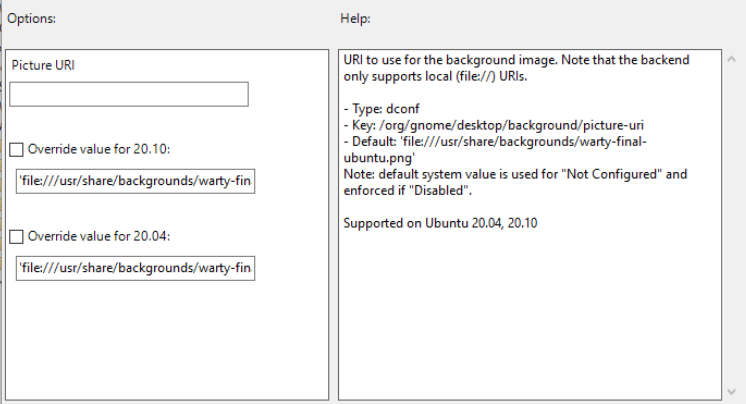
Text entry
The type Text represents a single line of text. If you don’t enclose a string with single quotes ' and the value is not a decimal, it will be done automatically and the entry will be sanitized (e.g. space, '…). If you want to force a decimal to be treated as a string, enclose the value with single quotes.
The default value will be already set.
Text list
A multiline text field is used for this case. A list can be:
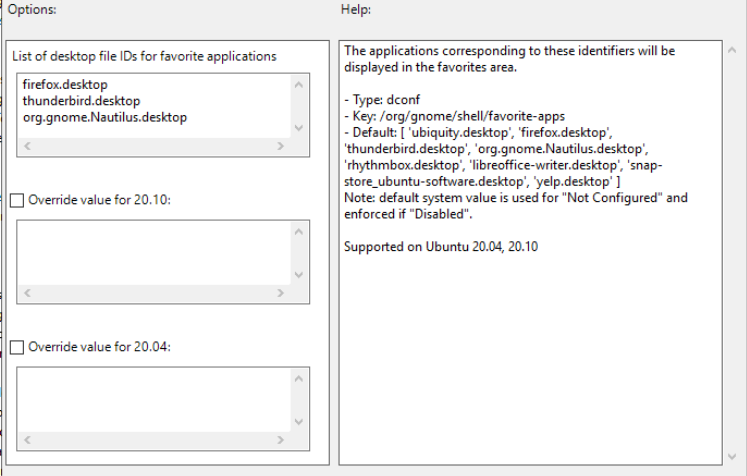
One item per line: any end of line will be considered as a delimiter Example:
libreoffice.desktop
firefox.desktop
nautilus.desktop
Multiple items on one line: a coma
,is the item delimiter:
libreoffice.desktop, firefox.desktop, nautilus.desktop
Note that spaces will be stripped automatically.
Both syntaxes can be combined:
libreoffice.desktop, firefox.desktop
nautilus.desktop
The type can be either text or numeric:
Text list:
libreoffice.desktop
firefox.desktop
nautilus.desktop
Decimal list:
42
300
10
Ensure that you enter the valid type of list, as expected by dconf setting. ADSys will do its best to try to match the entry with the right and expected dconf type.
String or decimal field ?
The type of the value will be detected automatically and interpreted as a number if it contains only digits and no quotes, everything else is considered a string. If you want to enforce a list to have string entries, enclose each entry with single quotes.
Text list:
'42'
'300'
'10'
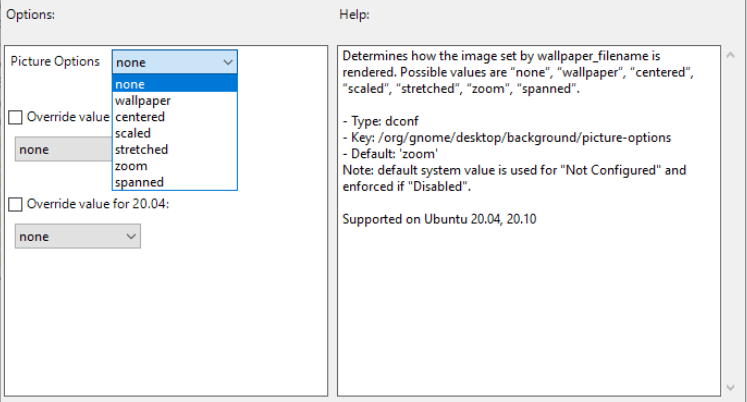
Dropdown list
A list field is a limited list of values to choose from. It is represented by a drop down list.
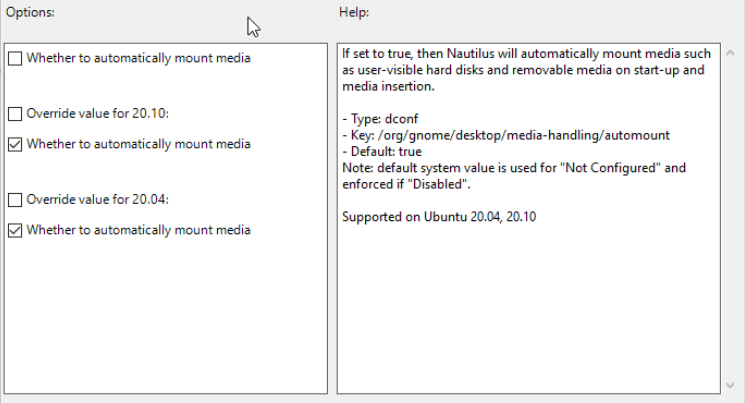
Checkbox
A checkbox will correspond to set to true or false values for the corresponding setting. The default value will be already selected.
Decimal
Decimal values are fields that allow only digits with optional upper and lower bounds. A spinner helps the user to increase or decrease the value.
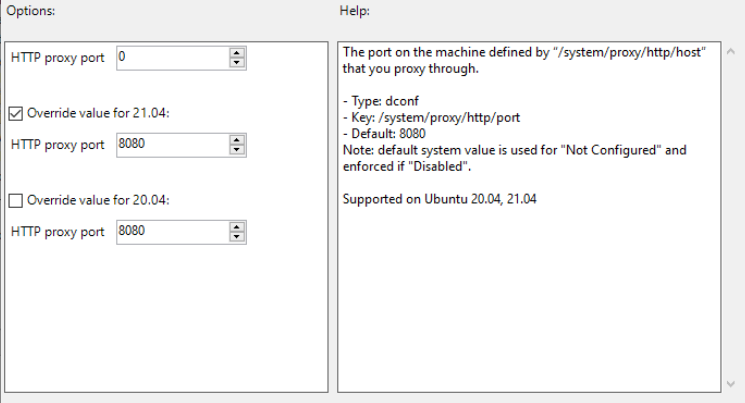
The limits, if any, will be specified in the right section, per release.
Multi-release support
ADSys supports setting different values for different releases of Ubuntu.
The top entry will set a common value between all clients, independently of the release it’s running on.
If you need to specify a per-release value for a set of clients, select the Override checkbox for the corresponding release and enter a value in the associated field. If the Override is checked, but no value is specified, the default value for this release will be used.
By definition, override takes precedence over the default value defined at the top for all the releases.
Finally, note that the help text on the right panel will list each default per release if they differ between themselves. In addition, it will list the supported releases for this setting.
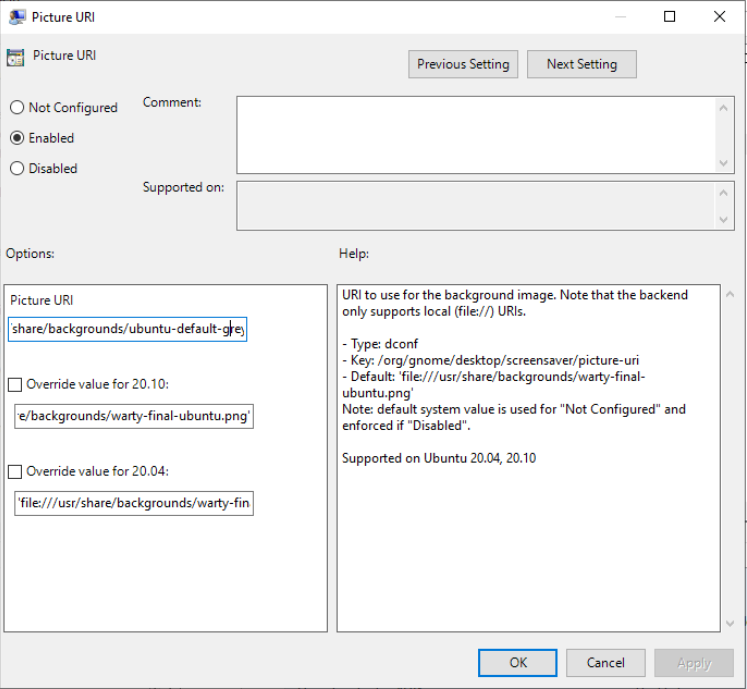
Multi-release overrides are only available when your Active Directory administrative templates defines more than one release. If this is not the case, you will only see the top entry to define your policy.
